Mid-Term marks are due
Please have all work up to
digital photography
submitted
by Friday November 9th, 2018
|
2.3 | Digital Photography
Digital photography technology is continually changing, however, the principles behind good photography don't.
This unit of the course gives you the opportunity to gain knowledge and understanding of digital photography including topics such as exposure settings, proper composition and framing of your shot, how light affects a photograph, how the camera sensor and lenses work, and how to process and edit a photograph using computer software. You will also learn tips and techniques on what not to do when taking a photograph.
This unit of the course gives you the opportunity to gain knowledge and understanding of digital photography including topics such as exposure settings, proper composition and framing of your shot, how light affects a photograph, how the camera sensor and lenses work, and how to process and edit a photograph using computer software. You will also learn tips and techniques on what not to do when taking a photograph.
|
Over the next week or so, you will get a shot list (see on right) updated each day telling the images you need to collect and submit for evaluation. You will need two good images of different subject matter, in different locations, to submit for each category in the end. So take as many pictures as you can and edit them down for your final selections for evaluation. These shot are not due on that day, you will submit them all together later. I do this so that you focus on one thing each day. If you see one of the shots while moving around the school you can snap another one if you thing it might be a better representation of that category.
|
WATCH HERE EACH DAY FOR YOUR SHOT LIST
|
This is an individual assignment. All photographs must be taken by you and edited by you. Give yourselves enough time to upload your images from your SD card each day. Images not saved to your computer during the same day class may not be on the camera the next day; the cameras are used by all my classes throughout the day.
All Photographs must be taken at school during class time using the cameras I provide or an approved camera that you bring in. No cell phone photos, photo taken at home, or anywhere outside off school property will be allowed. Use available light only; no flash photography.
Take as many pictures as you can so you have a good selection to choose from each day. Review the notes below to re-fresh yourself on what the various shots look like, and how to achieve them.
You are not required to submit each image each day, however if you stick to focusing on each category each day, you will achieve better results.
You must post your selects for evaluation to your ePortfolio and to the classroom Dropbox. Before uploading to the classroom Dropbox, place all your images in a folder with your name on the folder and the shot name on each file. Failing to follow this instruction will result in lower marks for each item that isn't identified. I will not guess what your claiming each shot to be since various shots could be used in multiple categories.
All Photographs must be taken at school during class time using the cameras I provide or an approved camera that you bring in. No cell phone photos, photo taken at home, or anywhere outside off school property will be allowed. Use available light only; no flash photography.
Take as many pictures as you can so you have a good selection to choose from each day. Review the notes below to re-fresh yourself on what the various shots look like, and how to achieve them.
You are not required to submit each image each day, however if you stick to focusing on each category each day, you will achieve better results.
- Remember that out of focus or blurred images created by camera movement will be marked at ZERO.
- Take many shots of the same subject so you have multiple selects.
- Select your best two shots from each category for submission.
- The subject matter in each select must be different than the other select.
- Also, one of the marks is on originality - is it different/unique than other people's shots in the class.
- Each image must include the name of the catergory/shot name to it's title or file name.
- You should have a minimum of 12 shots to cover the 6 categories over the five days.
- Click the PUBLISH>> orange button at the top right side of your website so that I can see your work.
You must post your selects for evaluation to your ePortfolio and to the classroom Dropbox. Before uploading to the classroom Dropbox, place all your images in a folder with your name on the folder and the shot name on each file. Failing to follow this instruction will result in lower marks for each item that isn't identified. I will not guess what your claiming each shot to be since various shots could be used in multiple categories.
Choosing your selects
Once you have collected enough images of the various categories, you will need to fine tune your images. Place all your images into a new folder on your desktop. You can name this folder something like digital photos or pix.
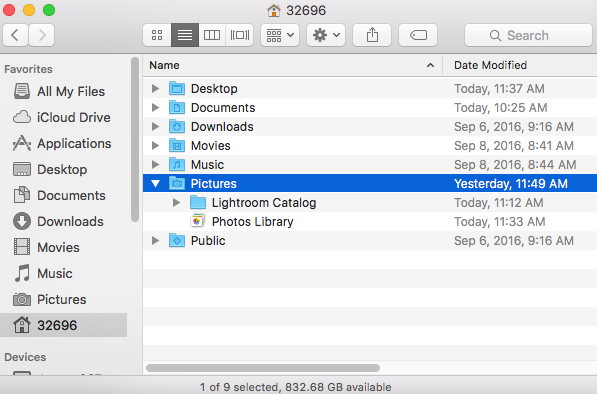 Save the Lightroom Catalog in Pictures folder.
Next we will use the Adobe Lightroom application to do minor editing and colour corrections. Once the Lightroom application had loaded, import your images.
Lightroom might ask for you to set up a new catalog to import to. Save this catalog to your Pictures folder.
Once your Lightroom catalog of images has been imported you will then decide what pictures will work best for you. This process is called choosing your selects. You need to determine what are your best two shots for each category. If you find you have more than two, don't worry, you can then make final selects after editing. Give your images ratings using the 5 star system. You might also want to tag your images with the keyword for each category. It will help in sorting. You can sort on ratings, keywords, or a whole lot of other choices within Lightroom.
EDITING
Once you have made your selects you will then make the necessary adjustments using the various sliders for exposure or tools for cropping, etc. Any major edits will need to be done with Photoshop. Right click on your image to directly launch Photoshop from within Lightroom. Ask if you need help in getting this working for you or if you have any other difficulty setting up your Lightroom catalog.

Original File
|

Final Edit
|
are YOU finished?
RE-EVALUATED SUBMISSIONSYou you need to resubmit any work for re-evaluation, please rename each in the following naming format:
Lastname_Firsname_2.3_DigitalPhotography_nameofcategory#.jpg or Lastname_Firsname_2.3_DigitalPhotography_nameofcategory#.psd (if you edited it photoshop) # sign replaced with 1 or 2 , depending if it was your first image or second image in that category. Do not put the images in a folder, submit each file separately. |
2 images of Texture
2 images of Macro or CloseUp 2 images of Shadow or Silhouette 2 images of Perspective 2 images of Time Lapse 1 images of Rule of Thirds Object 1 images of Rule of Thirds Portrait |
BELOW ARE SAMPLES OF IMAGES I'VE COLLECTED IN OR AROUND THE SCHOOL. THIS WILL SHOW YOU THAT THE IMAGES ARE OUT THERE, YOU JUST NEED TO LOOK FOR THEM. - MR. P.
DAY 1 & 2 - MACRO & TEXTUREWant some tips on how to get great Macro and Texture shots? Click Here
You will need two selected images for Macro and
two selected images for Texture. DAY 4 - PerspectiveWhat is the Perspective? Click Here to find out
You will need two selected images for Perspective.
|
DAY 3 - SHADOW or silhouetteWhat is the difference with Shadow and Silhouette? Click Here
You will need two selected images. They can be Shadow or Silhouette, or a combination of the two.
DAY 5 - Rule of tHIRDSWant some tips on how to get great Rule of Third shots? Click Here
You will need One of an Object and One of a Portrait.
|
DAY 6 - Time LapseAcceptable images must have something in the background in focus.
Need help with the camera setting?. You will need two selected images for Time Lapse. They must be shot in two different areas. Two shots submitted from the same area will only count as one completed shot. The background should be visible and in focus. Your subject and light trail should be the only things blurred in your images.
|
Previous Years submitted work
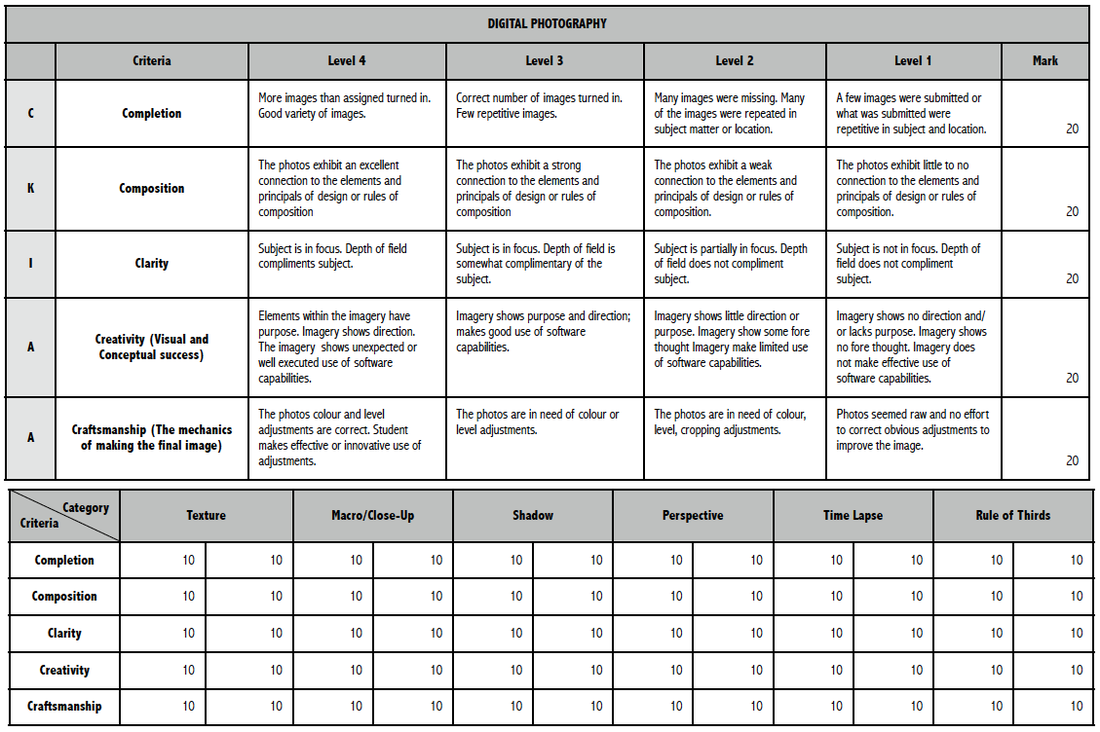
RUBRIC