
Premere Pro Tips |
Premere Pro is a powerful video editing application that is used in the film, TV, and video production industry. Getting use to it's features will take a bit of practice and this page will help you with some features worth knowing about
|
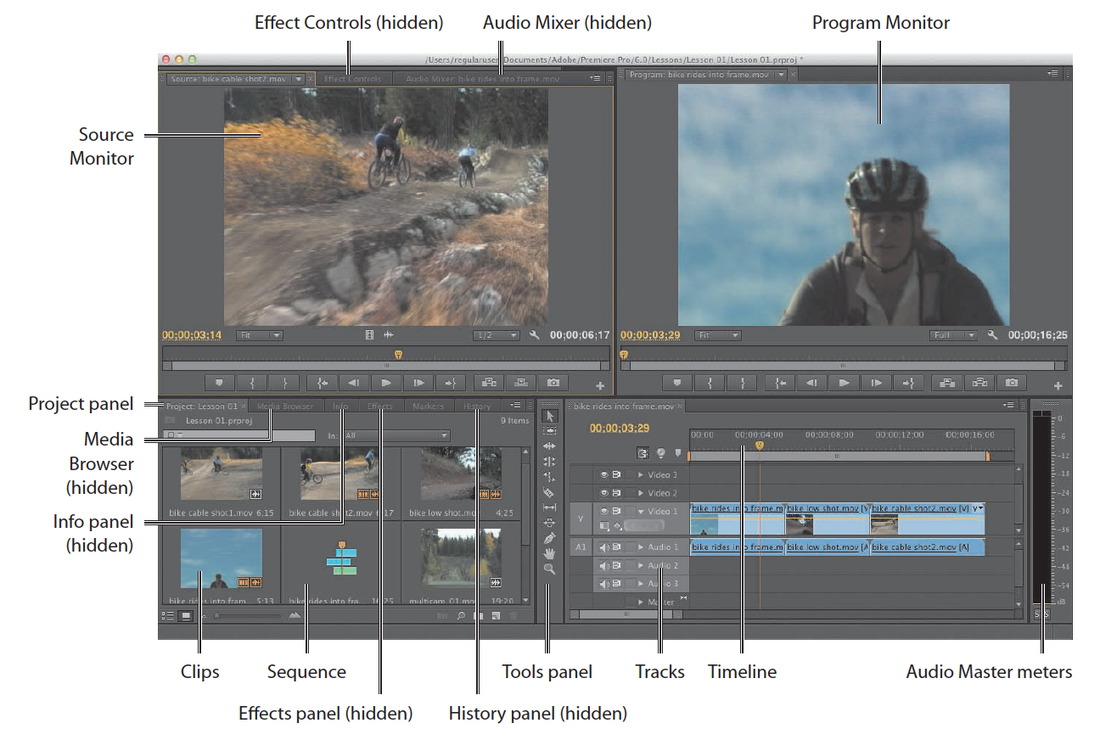
WorkspacesThe image on the right gives you a basic overview of the applications areas on a typical workspace window. You can change up your workspace depending on the post-production you are working on. Click the image to enlarge to see more details of the areas you might not recognize.
Each workspace item appears in its own panel, and multiple panels can be combined into a single frame. Some items with common industry terms stand alone, such as Timeline, Audio Mixer, and Program Monitor. The main user interface elements are as follows: |
|
• Timeline panel: This is where you’ll do most of your actual editing. You view and work on sequences (the term for edited video segments or entire projects) in the Timeline panel. One strength of sequences is that you can nest them (place sequences inside other sequences). In this way, you can break up a production into manageable chunks or create unique special effects.
• Tracks: You can layer—or composite—video clips, images, graphics, and titles on an unlimited number of tracks. Video clips on upper video tracks cover whatever is directly below them on the Timeline. Therefore, you need to give clips on higher tracks some kind of transparency or reduce their size if you want clips on lower tracks to show through.
• Monitor panels: You use the Source Monitor (on the left) to view and trim raw clips (your original footage). To view a clip in the Source Monitor, doubleclick it in the Project panel. The Program Monitor (on the right) is for viewing your sequence. Some editors prefer working with only one monitor screen. You can change to a single-monitor view if you choose. Click the Close button on the Source tab to close that monitor. In the main menu, choose Window > Source Monitor to open it again.
• Project panel: This is where you place links to your project’s media files: video clips, audio files, graphics, still images, and sequences. You can use bins—similar to folders—to organize your assets.
• Media Browser: This panel helps you browse your hard drive to find footage. It’s especially useful for file-based camera media.
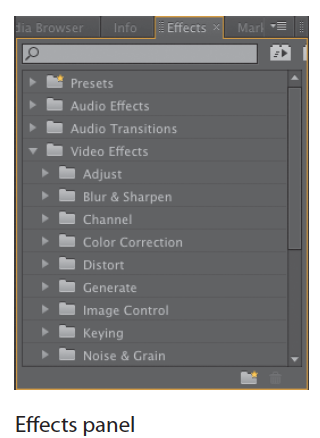
• Effects panel: This panel contains all the clip effects you will use in your sequences, including video filters, audio effects, and transitions (docked, by default, with the Project panel). Effects are grouped by type to make them easier to find.

• Audio Mixer: This panel (docked, by default, with the Source and Effect Controls panels) is based on audio production studio hardware, with volume sliders and panning knobs. There is one set of controls for each audio track on the Timeline, plus a master track.
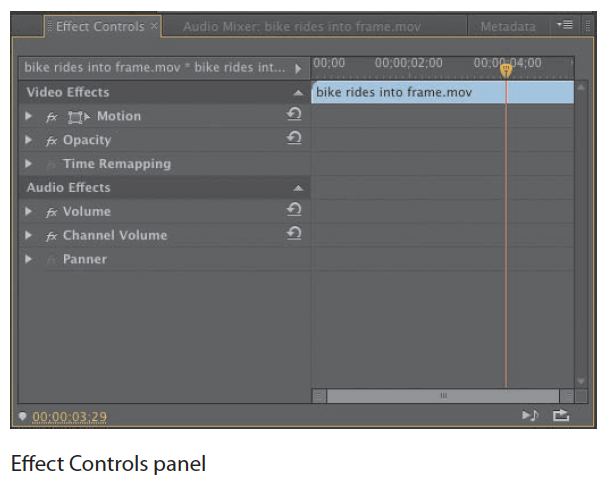
• Effect Controls panel: This panel (docked, by default, with the Source and Audio Mixer panels, or accessible via the Window menu) displays the controls for any effects applied to a clip you select in a sequence. Motion, Opacity, and Time Remapping controls are always available for visual clips. Most effect parameters are adjustable over time.
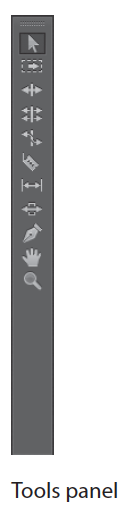
• Tools panel: Each icon in this panel represents a tool that performs a specific function, typically a type of edit in a sequence. The Selection tool is context-sensitive, which means it changes appearance to indicate the function that matches the circumstances. If you find your cursor doesn’t work as you expect it, it might be because you have the wrong tool.
• Info panel: The Info panel (docked, by default, with the Project panel and Media Browser, or accessible via the Window menu) presents information about any asset you select in the Project panel or any clip or transition selected in a sequence.
• History panel: This panel (docked, by default, with the Effects and Info panels) tracks the steps you take and lets you back up easily. It’s a kind of visual Undo list. When you select a previous step, all steps that came after it are also undone.
• History panel: This panel (docked, by default, with the Effects and Info panels) tracks the steps you take and lets you back up easily. It’s a kind of visual Undo list. When you select a previous step, all steps that came after it are also undone.
Workspaces can be customized to your desired way of working. To revert back to the default workspace go under Window > Workspaces > Reset to Saved Layout. You can also save your favourite Workspace setup in this area and call it whatever your want to refer back to it at any time.
