
Place An Image In Text With Photoshop
In this Text Effects tutorial, we’re going to learn how to place an image in text, a very popular effect to create in Photoshop, and one that also happens to be very easy to do thanks to the power of clipping masks, as we’re about to see!
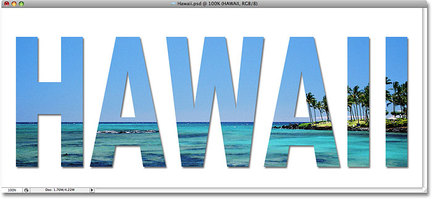
Here’s the effect we’re going for:
Here’s the effect we’re going for:
Step 2: Duplicate The Background Layer
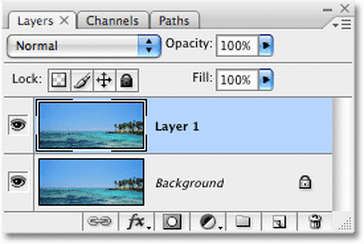
Photoshop’s Layers palette.
If we look in the Layers palette, we can see that we currently have one layer, named Background. This layer contains our image. We need to duplicate this layer, and the easiest way to do that is by using the keyboard shortcut Ctrl+J (Win) / Command+J (Mac). If we look once again in the Layers palette, we see that we now have two layers. The original Background layer is on the bottom, and a copy of the Background layer, which Photoshop automatically named “Layer 1″, is sitting above it:
Step 3: Add A New Blank Layer Between The Two Layers
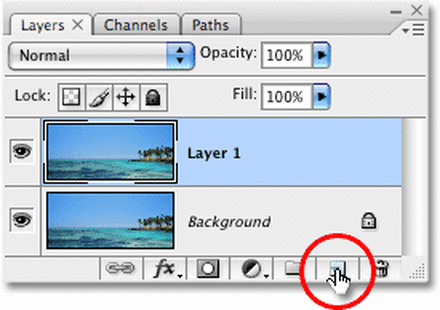
Hold down “Ctrl” (Win) / “Command” (Mac) and click on the New Layer icon in the Layers palette.
Next, we need to add a new blank layer between the Background layer and “Layer 1″. Currently, “Layer 1″ is the layer that’s selected in the Layers palette. We can tell which layer is selected because the selected layer is always highlighted in blue. Normally, when we add a new layer, Photoshop places the new layer directly above whichever layer is currently selected, which means that Photoshop would place the layer above “Layer 1″. That’s not what we want. We want the new layer to be placed below “Layer 1″. Here’s a useful trick. To add a new layer below the currently selected layer, hold down your Ctrl (Win) / Command (Mac) key and click on the New Layer icon at the bottom of the Layers palette. Holding down Ctrl (Win) / Command (Mac) is the trick to placing the layer below the currently selected layer:
Step 4: Fill The New Layer With White
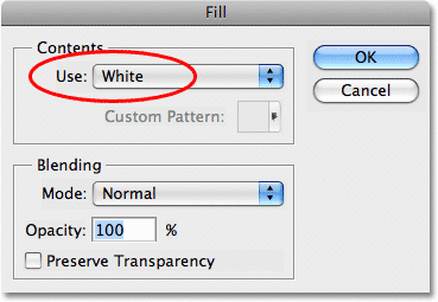
Select White for the Contents option at the top of the Fill command’s dialog box.
At the moment, our new layer is completely blank. Let’s fill it with white so it will appear as a white background after we’ve placed our image inside the text. Go up to the Edit menu at the top of the screen and choose Fill. This will bring up Photoshop’s Fill dialog box. Select White for the Contents option at the top of the dialog box, then click OK to exit out of the dialog box:
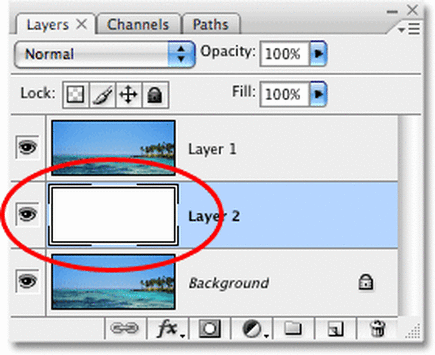
The preview thumbnail for “Layer 2″ shows that the layer is now filled with white.
Nothing will appear to have happened in the document window, since the image on “Layer 1″ is blocking “Layer 2″ from view, but if we look at the layer preview thumbnail for “Layer 2″ in the Layers palette, we can see that sure enough, the layer is now filled with solid white:

